EnneadTab for CAD
How to Install EnneadTab for CAD
- Navigate to
C:\Users\[USER_NAME]\Documents\EnneadTab Ecosystem\EA_Dist\Installation - Find the file
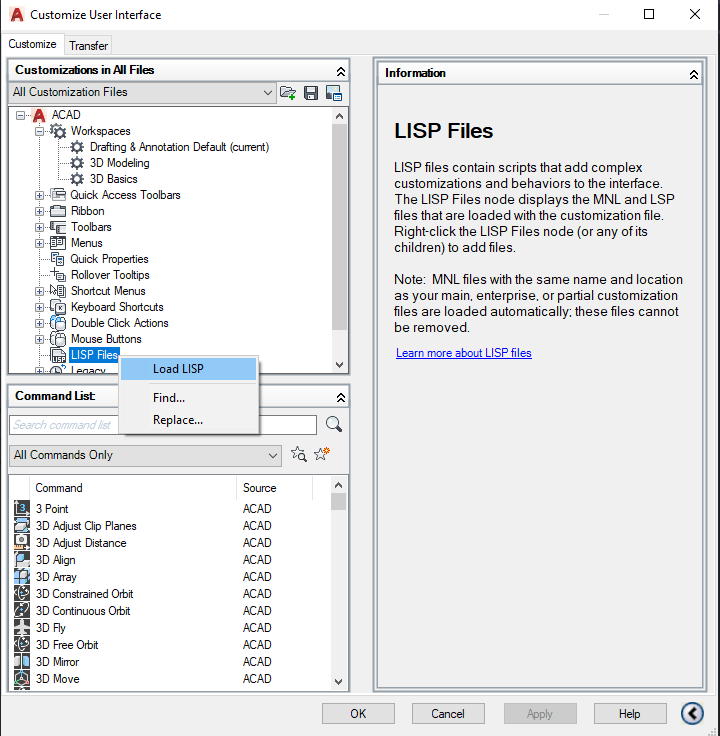
EnneadTab_For_CAD.lsp - Open CAD. Type the command
CUI(Customize User Interface) - Right click on "LISP Files" and Load "EnneadTab_For_CAD.lsp"
- Restart CAD.
CAD Command Reference
- EA_EXPLODE_ALL_BLOCKS: Explode all blocks including nesting blocks. If you want to import to Rhino you may consider flattening the CAD dynamic block by this command. Otherwise you will see all version of block overlapping in Rhino. If you are planning to import to Revit, this step is not needed.
- EA_DELETE_ALL_SOLID_HATCH: Remove all solid hatch, including inside the blocks
- EA_ALL_COLOR_BY_LAYER: Set all objects display color by layer
- EA_REMOVE_ALL_DIM: Remove all dim objs
- EA_EXPLODE_NON_SOLID_HATCH: Freeze the appearance of CAD hatch before going to Revit. CAD hatch on small scale will become black solid in revit. There is not way around since 1985. So here this command explode the hatch into elements so its appearance is preserved regardless of the scale.
- EA_PREP_CAD_FOR_REVIT: Quick alias for: DELETE_ALL_SOLID_HATCH + ALL_COLOR_BY_LAYER + EA_REMOVE_ALL_DIM + EA_EXPLODE_NON_SOLID_HATCH
- EA_PREP_CAD_FOR_RHINO: Quick alias for: DELETE_ALL_SOLID_HATCH + ALL_COLOR_BY_LAYER + EA_REMOVE_ALL_DIM + EA_EXPLODE_ALL_BLOCKS + EA_EXPLODE_NON_SOLID_HATCH
For a video demo, see this YouTube
tutorial.